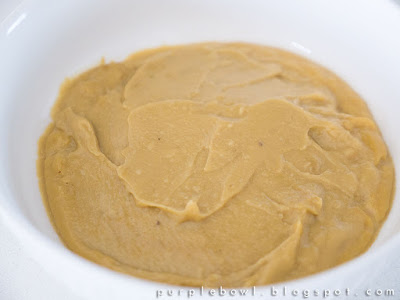
Kaya (coconut jam) toast is a popular food in Malaysia and is available in almost any coffee shop aka kopitiam. Seriously, I can’t recall when the last time I had Kaya toast. Well, kaya toast can be found in some Malaysian restaurants such as PappaRich and Old Town in Melbourne. One can also buy the kaya jars from Asian grocers. However, to me, those kaya aren’t the same as homemade kaya. In my opinion, homemade kaya tends to be richer in flavours, probably because of the quality of the ingredients.
My mum used to make kaya at home when I was young. I remembered it was a tedious process where constantly stirring for hours is inevitable. Hence, it never occurred to me to make my own kaya until I saw this 10-minute kaya recipe from Kitchen Tigress. It’s good to know that there are a few tweaks to shorten the cooking time such as using egg yolks only instead of whole eggs as well as substituting part of the sugar with palm sugar. I added an extra egg yolk and reduced the sugar from the existing recipe. Well, it took me about 20-25 minutes in total from preparation until the kaya is cooked to my preferred texture.
Since then, I have ensured that there’s always a jar of homemade kaya available in my fridge! :)
Recipe:
(to make a bowl, about 170g jar)
5 egg yolks
4 pandan leaves
200ml coconut milk
40g palm sugar
35g castor sugar
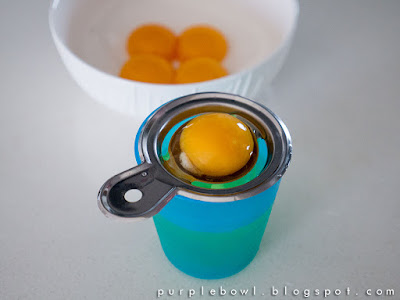
1. Separate the egg yolks from the egg whites. Try to ensure that there isn’t any egg white. Otherwise, the texture of the kaya won’t be as smooth and might be a bit lumpy if it’s cooked over high heat. This is why those recipes with egg whites require cooking over a water bath.
2. Wash the pandan leaves and cut each leaf into 4 parts.
3. Put pandan leaves, coconut milk, palm sugar and castor sugar into a pot. Cook over medium heat until the palm sugar is melted and the mixture starts to simmer. Remove the pot from the heat.
4. Gently mix the egg yolks in a bowl and slowly mix in half of the coconut milk mixture from the pot.
5. Pour the mixture in the bowl back to the pot.
6. Return the pot to the stove. Constantly stirring the mixture over medium heat until it starts to thicken.
7. Reduce to low heat and keep stirring until the kaya is thickened or to your preferred thickness. I like it slightly thicker and it took me about 15mins to get to my preferred texture.
8. Cool the kaya. Transfer the cooled kaya into a jar and store in the fridge. Used within a week.


No comments:
Post a Comment