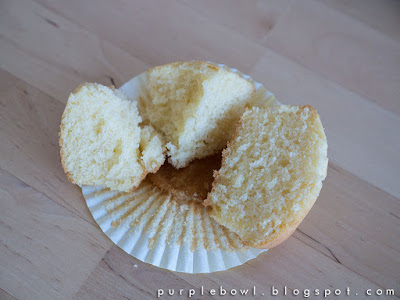
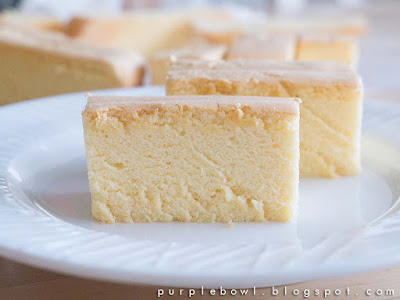
Showing posts with label Dessert. Show all posts

Sunday, August 23, 2015

Green tea muffins recipe

I'm not sure if I'm addicted to baking or the smell of baking. Well, I'm excited to see cake rise in the oven. I'm even more delighted to fill my home with the smell of baking just like a bakery shop. Haha. I believe I'm not alone!

On a busy day, I'd simply bake something quick such as muffins so that my little one's tea break and my breakfast on the following days are catered for.

Green tea muffins recipe
Green tea chocolate chips muffins recipe

Following the vanilla cupcakes, I found this lovely Chocolate chips green tea muffins recipe from Eugenie Kitchen. It's a very simple recipe. After some modifications to enhance the green tea flavor as well as making the texture lighter by replacing a portion of flour with cake flour, it's simply the best muffins I've baked. 

Recipe:

(12 muffins)

100g all purpose flour
150g cake flour
1 1/2 tablespoons green tea powder
3 teaspoons baking powder
1 egg
100g caster sugar
1/4 teaspoon salt
1 teaspoon vanilla extract
95ml vegetable oil
190ml milk
45g dark chocolate chips
30g white chocolate chips

1. Sift all the dry ingredients (all purpose flour, cake flour, green tea powder and baking powder) into a mixing bowl. Mix well and set aside. 

2. In a separate mixing bowl, beat egg, sugar and salt until pale in color. 

3. Add in vanilla extract and vegetable oil. Whisk until combine. 

4. Add in milk and mix well. 

5. Now, back to the dry ingredients mixing bowl. Make a well in the center of the dry ingredients, pour in the wet mixture and gently fold until almost combined.

6. Add in dark and white chocolate chips and fold until just combined. Do not over fold/mix. 

7. Line patty pans or cupcake cases on a cupcake pan. 

8. Scoop the batter onto the patty pans evenly, about 1/2 full each. 

9. Bake in a pre-heated oven at 170c for about 15mins or until the inserted skewer comes out clean. 

10. Cool cupcakes on a wire rack. 

Green tea muffins recipe
Chocolate chips green tea muffins recipe
Chocolate chips green tea cupcake recipe

Thursday, August 6, 2015

Vanilla cupcakes recipe

I'm a cupcake lover. I used to buy cupcakes from the local bakery and still do once in a while until I started baking my own cupcakes. If you ask me where to find the best cupcakes in Melbourne, I'd certainly recommend Joy Cupcakes without hesitation. At Joy Cupcakes, every cupcake is beautifully made and comes with various interesting flavors. Often, there'll be a special cupcake flavor available for a limited time to celebrate an occasion/event. The cupcakes produced by Joy Cupcakes are light and moist. And most importantly, with the perfect sweetness. Unlike the sweet icing on a typical cupcake, the meringue buttercream frosting from Joy Cupcakes is something one can't resist. Hence, it's worth to check it out if you're near any of their outlets.

Because of this, I was intrigued to find out the secret to a great tasting cupcake. Well, at least for the base white/vanilla cupcake that could go with any frosting. So, I've been trying new vanilla cupcake recipes every now and then. 

Vanilla cupcakes recipe
Vanilla cupcake
basic cupcake recipe

Recently, I found this basic cupcake recipe from Eugenie Kitchen and I quite like the light and fluffy texture. Although it doesn't taste exactly like those from Joy Cupcakes, I'll settle for this recipe for now :) Note that I've reduced the sugar and salt from the original recipe to adapt to my taste buds. If you like a bit of chocolate flavor, fold in some dark chocolate chips before scooping the batter onto the patty pans or cupcake cases. They taste good too.

Chocolate chips cupcakes recipe


Recipe: 

(make 16 cupcakes)

128g all-purpose flour
150g cake flour
5 teaspoons baking powder
1/4 teaspoon Salt
200g unsalted butter
130g Caster sugar
3 Eggs
1 teaspoon vanilla extract
120ml milk

1. Sift all-purpose flour, cake flour, baking powder and salt into a mixing bowl. Whisk and mix well. 

2. Beat butter and sugar in another mixing bowl until pale and fluffy.

3. Add in eggs, one at a time. Beat thoroughly after each addition. Beat on a higher speed after the last addition until everything is well combined.

4. Fold 1/3 flour mixture onto the batter until combined. Add in 1/2 milk and fold until even. Repeat the same by folding in another 1/3 flour mixture and 1/2 milk, follow by vanilla extract and lastly the 1/3 flour mixture. 

5. Line patty pans or cupcake cases on a cupcake pan. 

6. Scoop the batter onto the patty pans evenly, about 2/3 full each. 

7. Bake in a pre-heated oven at 160-170c for about 15-20mins or until golden brown and that the inserted skewer comes out clean. 

8. Cool cupcakes on a wire rack. 
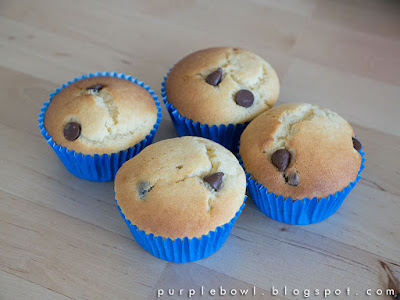
White cupcakes recipe
basic cupcakes recipe

Wednesday, August 5, 2015

Lin Chee Kang (lotus seed dessert) recipe

One thing I like about Chinese desserts is that they're very easy to make. Often, they're full of goodness too. Lin Chee Kang (aka lotus seed dessert) is a good example. 

Lin Chee Kang recipe

The best Lin Chee Kang I had in Malaysia was from a dessert stall at Wai Sek Kai, SS2 in Petaling Jaya (PJ). Not sure if this stall still exists as it was almost a decade ago since my last visit. 

I haven't tried any Lin Chee Kang in Melbourne although there are a number of Asian dessert stalls. Hence, I can't say which is the best. Well, given that it's so easy to make, I decided to make it at home instead ;) There's no problem in getting all the required ingredients in Melbourne. They should be easily available from an Asian grocer. Below is my version of Lin Chee Kang. It's so simple and yet delicious. 

Recipe: 


1 big White fungus/snow ear fungus
Red dates*
Dried longan*
Lotus seeds*
Goji berries*
Lily Bulbs*
Rock sugar
2 litres Water

*About a handful each

1. Soak white fungus/snow ear fungus with water until soft. Wash and rinse with water. 

2. Wash and rinse red dates, dried longan, lotus seeds, goji berries and lily bulbs with water. 

3. Bring the 2 litres of water to boil in a pot. 

4. Add in all the ingredients except rock sugar and bring it to boil. 

4. Reduce to low heat and simmer for 1-2 hours.

5. Add in rock sugar according to the sweetness of your liking. Cook until the rock sugar is fully melted.

6. Serve while it's warm. 

Lin Chee Kang recipe
Lotus seed dessert recipe

Thursday, July 30, 2015

Chocolate coconut butter cake recipe

To be honest, I've never been a fan of coconut flavor cake. However, when I saw the photos of the coconut and chocolate butter cake recipe by NasiLemakLover, I told myself that I must at least give it a go. I'm glad I did. It's such a beautiful butter cake! 

Chocolate coconut butter cake recipe

The coconut layer compliments the chocolate butter cake, making it a perfect combination. Never did I know that coconut goes so well with chocolate. As usual, I made some minor adjustments to the original recipe mainly to reduce the sweetness and make the coconut layer more subtle to suit my taste buds. 

Recipe: 

(8-inch square pan, but I used a 9-inch square pan)

230g unsalted butter (room temperature)
120g caster sugar
4 eggs 
1 teaspoon vanilla extract
210g self raising cake flour (or mix 210g cake flour with 1 1/2 teaspoons baking powder)
80ml milk

Coconut layer:
30g desiccated coconut

Chocolate layer: 
Mix 1 tablespoon cocoa powder with 1 1/2 tablespoons milk to form a cocoa paste.
20g dark chocolate chips

1. Beat butter and sugar in a mixing bowl until pale and fluffy.

2. Add in eggs, one at a time. Beat thoroughly after each addition. Add the vanilla extract with the last egg. Beat for another 1 minute after the last addition until everything is well combined.

3. Sift 1/4 self raising cake flour onto the batter and fold with a spatula until even. Repeat this step for another 1/4 self raising cake flour. 

4. Add half the milk and fold well. Sift in 1/4 self raising cake flour and fold until combine. Repeat the same for the remaining milk and the self raising cake flour. 

5. Divide the batter equally onto two mixing bowls. 

6. Fold desiccated coconut onto one part of the batter for the coconut layer. 

7. Fold the cocoa paste and dark chocolate chips onto the other part of the batter for the chocolate layer. 

8. Line cake tin with parchment paper. 

9. Pour chocolate batter onto the cake tin and spread evenly, follow by the coconut batter on top. 

10. Bang the cake tin on the table top a few times to release the big air bubbles.

11. Bake in a pre-heated oven at 160c for about 45 mins or until the inserted skewer comes out clean.

12. Remove the cake from the cake tin and let it cool on a wire rack.

Chocolate coconut butter cake
Chocolate coconut cake

Friday, July 24, 2015

Chocolate cake with mascarpone cream recipe

I've been baking a lot of sponge cakes lately. Therefore, I was looking for a soft and moist chocolate cake recipe for a change. After a long search, I finally found the soft and moist chocolate cake from Wendyinkk's blog with some alterations mainly to reduce the sweetness and making it lighter by using only cake flour. This chocolate cake is really soft even after it was kept in the fridge. I think it is a great cake base for any frosted birthday cake.

Chocolate cake with mascarpone cream recipe
Chocolate cake with mascarpone cream

Often, I would use some fresh fruits like strawberries to balance out the sweetness of a chocolate cake. In this instance, I've made a simple chocolate cake with strawberry filling and frosted it with mascarpone cream. It's a simple, yet yummy cake.

Recipe:

(20cm round cake tin)

33g Cocoa powder
59g Boiling water
75g Cake flour
1 teaspoon Baking powder
1/2 teaspoon Sodium bicarbonate
90g Sugar
1/8 teaspoon salt
2 Large egg yolks
54g Corn oil
1/2 teaspoon Vanilla extract
2 Large egg whites

1. Mix boiling water with cocoa powder in a mixing bowl to form a paste. Leave it aside to cool.

2. In a separate bowl, sift in cake flour, baking powder and Sodium bicarbonate. Add in sugar and salt. Mix well and leave it aside.

3. Back to the mixing bowl with cocoa paste, add in egg yolks and oil. Beat on medium speed for about 1 minute.

4. Add in vanilla extract and beat until combine.

5. Add in the dry ingredients, half at a time. Mix well on each addition. After that, beat on high speed for about 1 minute.

6. Add in egg whites and beat on high speed for another 2 minutes until all the ingredients are well incorporated.

7. Line parchment paper on the bottom of cake tin. Pour batter onto the cake pan and spread the batter evenly. Lightly bang the cake pan on the table top a few times to release the air bubbles.

9. Bake in a pre-heated oven at 160c for about 25-30mins or until the inserted skewer comes out clean.

10. Remove the cake from the cake tin and let it cool on a wire rack.


Mascarpone cream:

250g mascarpone
2 tablespoons castor sugar*
1 teaspoon vanilla extract
300ml whipping cream

* Adjust the amount of sugar based on your liking.

1. Cream mascarpone, sugar and vanilla extract in a chilled mixing bowl over a bowl of ice water until combine.

2. Add in whipping cream and beat until stiff.


To assemble the cake:

Cut strawberries

1. Slice the cake into 2 layers.

2. Lay first cake layer on a plate. Spread a thin layer of mascarpone cream on top of it evenly.

3. Sprinkle the cut strawberries evenly on the mascarpone cream layer.

4. Spread another thin layer of mascarpone cream on top of the strawberries.

5. Cover it with the other cake layer.

4. Frost the whole cake with the remaining mascarpone cream.

5. Sprinkles left over strawberries on top of the cake.

6. Store in the fridge for 1-2 hours.

7. Cut and serve while it's cold.

Chocolate cake
Soft and moist chocolate cake recipe
Chocolate cake with strawberry filling
Chocolate cake with mascarpone cream frosting
Chocolate cake

Thursday, July 23, 2015

Baked Chinese egg cake (ji dan gao) 烤鸡蛋糕 recipe

Chinese egg cake, also known as Ji Dan Gao in Mandarin is a kind of sponge cake with only 4 ingredients (probably this is the only recipe that I could remember). As the flavour comes from the eggs, using good quality free range eggs is quite important.

Chinese egg cake recipe

The following recipe which I got from Bake for Happy kids with minor modification is for baking instead of steaming. I'm not sure if it will yield the same result if it was steamed. Maybe someone can try and let me know :P

Recipe: 

(original recipe asked for a 5-6 inch round cake tin, but I used a 8 inch round cake tin which resulted in a shorter cake)

3 egg yolks
1 egg
50g corn oil
65g self raising cake flour (mix 65g cake flour with 1/2 tsp baking powder if you don't have self raising flour)

3 egg whites
50g icing sugar

1. Beat egg yolks and egg in a mixing bowl with a hand whisk.

2. Add in corn oil and stir to combine.

3. Sift in self raising cake flour and mix well. Leave the egg yolk mixture aside.

4. Beat the egg whites in another mixing bowl.

5. Gradually add in the sugar when the egg whites start to thicken. Beat until firm peak stage.

6. Loosen the egg yolk mixture by slowly stirring the mixture from the bottom of the mixing bowl using a whisk.

7. Add the egg white mixture onto the egg yolk mixture in 3 batches. Mix until they are almost combined on each addition. Lastly, scrape down and fold until everything is evenly combined.

8. Line cake pan with parchment paper. Pour batter onto the cake pan and spread the batter evenly. Lightly bang the cake pan on the table top a few times to release the air bubbles.

9. Bake in a pre-heated oven at 160c for about 30mins or until the inserted skewer comes out clean.

10. Remove the cake from the tin and let it cool on a wire rack.
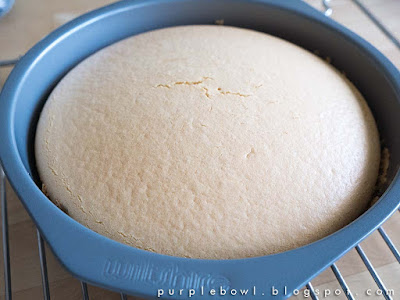
Baked Chinese sponge cake recipe
Baked ji dan gao recipe
Ji dan gao recipe

Wednesday, January 28, 2015

Japanese green tea cheesecake recipe

I have a bad habit of stocking up food whenever there's a discount. Often, I end up throwing them away simply because I have no time to finish or use them before the expiry date. I recently realised I have 2 blocks of cream cheese which are expiring in 1-2 months time. Rather than baking a few cheesecakes together towards the end of its shelf life, I thought I should at least use a block now. This is when I decided to bake a Japanese green tea cheesecake.

Japanese green tea cheesecake recipe
green tea cheesecake recipe


This is my second attempt in baking green tea cheesecake by modifying the Japanese cheesecake recipe which I baked previously. My previous attempt wasn't that good as the batter was a tad too watery after I increased the amount of milk and the cake sunk. Hence, I tweaked the recipe further by increasing the milk portion and reducing one egg to reach a balance this time. Besides that, instead of turning green tea powder into green tea paste which has extra water content, I used the green tea powder directly. The result was satisfying! 

Recipe:

(Make one 8 inch cake)

150 ml milk
50g unsalted butter 
250g cream cheese 
60g cake flour
20g corn flour
5 egg yolks  
20g green tea powder 

5 egg whites 
1/4 tsp. cream of tartar
110g castor sugar (increase the amount if you prefer a sweeter cake.)

1. Heat up the milk until warm. Pour warm milk onto cream cheese and butter in a mixing bowl. Melt the mixture and mix well over a pot of hot water. Some recipes suggest to sieve the mixture at this point to get rid of the small slumps. Interestingly, my mixture was silky smooth so I didn't sieve the mixture. It's up to you to decide. 

2. Cool the mixture. Add in the sifted cake flour, corn flour and green tea, followed by egg yolks and mix well. Leave the cream cheese mixture aside.

3. Beat the egg white in a mixing bowl.

4. Add cream of tartar as soon as the beaten egg white starts to foam.

5. Gradually add in the sugar when the egg white starts to thicken. Beat until soft peak stage.

6. Add the egg white mixture onto the cream cheese mixture in 3 batches. Mix until they are almost combined on each addition. Lastly, scrape down and fold until everything is evenly combined. Bang the batter on the table for a few times to release the big air bubbles.

7. Pour the batter into a 8 inch round cake tin. I used a non-stick cake tin. Otherwise, you could lightly grease and line the bottom and sides of the pan with parchment paper. 

8. Bake the cheesecake in a water bath in a pre-heated oven at 160c for 1 hours 10 minutes or until golden brown. 

9. Remove the cake from the oven and let it cool on the wire rack.

10. Gently separate the cheesecake from the cake tin. Cut (without sawing) and serve.

Note: If you want to chill the cheesecake, make sure you remove the cheesecake from the fridge 30mins before serving. Otherwise the cheesecake will be a bit firmer and not cotton soft.

Japanese green tea cheesecake recipe
Cotton soft Japanese green tea cheesecake recipe
green tea cheesecake recipe
Japanese green tea cheesecake


Friday, January 16, 2015

Chocolate cake recipe

Happy 2015! I hope it's not too late to wish everyone a happy new year :) 

Chocolate cake recipe
chocolate sponge cake with mascarpone cream filling and chocolate cream frosting

I baked my first cake in 2015. I'm glad it turned out well. It's nothing new, it was the chocolate sponge cake with mascarpone cream filling and chocolate cream frosting which I baked before. The only difference is the presentation of the cake. I think it looked nicer this time. Besides that, I added a layer of chocolate cream as the filling on top of the mascarpone cream layer so that it has more chocolate flavour.

Well, it was so yum that 2 adults finished the whole cake in 2 days! Check out the recipe here.

Friday, August 22, 2014

Easy pumpkin sago dessert 金瓜西米露 recipe

Although pumpkin sago dessert might not be as popular as mango sago dessert, its nutrition benefits are just as good if not better. Pumpkin is rich in dietary fibre, vital antioxidants, minerals and vitamins. It's very low in calories too. Hence, it's an excellent ingredient for making dessert.

pumpkin sago dessert

I learned this pumpkin sago dessert from my mum. It uses only 6 ingredients which are pumpkin, gula melaka (coconut palm sugar), pandan leaves, sago, water and milk. It's not hard to get gula melaka and pandan leaves in Melbourne. You could buy them from most of the Asian grocers who carry Malaysian products such as Laguna at QV and Hometown Asian supermarket on Elizabeth St in the city. As for sago, you can get it from any supermarket such as Coles or Woolworths.

Well, pumpkin sago can be served cold or hot based on your preference. It's probably a good idea to serve it hot during winter. However, I personally like the cold version.

Recipe:

(4-6 servings)

1/4 medium size pumpkin
3 pandan leaves
1/4 cup* sago
2 1/2 cups* water or enough water to cover all the pumpkin in the pot
3/4 cup* milk
Gula melaka (gula melaka comes in a log shape, you need to break it into small pieces)

* 1 cup = 236ml

1. Soak sago with water. Remove the pumpkin skin and cut the pumpkin into small slices.

2. Put pumpkin, pandan leaves and water into a pot.

3. Boil until the pumpkin is soft.

4. Purée the pumpkin through a sieve and add it back to the pot.

5. Add gula melaka pieces. Adjust the amount to get to your preferred sweetness. Bear in mind that milk will be added later which would affect the sweetness.

6. Add the soaked sago and boil.

7. Cook until the sago is becoming transparent, stir in milk and turn off the heat.

8. Serve while it is hot for hot dessert or chill in the fridge for cold dessert.

pumpkin sago dessert - boil pandan leaves and pumpkin in water

pumpkin sago dessert - sago and gula malacca or gula melaka

pumpkin sago dessert - soak sago in water
pumpkin sago dessert - puree pumpkin
pumpkin sago dessert - add sago and boil

pumpkin sago dessert - stir in milk

pumpkin sago dessert