Showing posts with label Easy recipes. Show all posts

Thursday, October 8, 2015

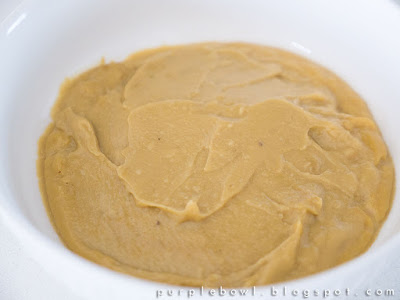
Easy homemade kaya recipe

Kaya (coconut jam) toast is a popular food in Malaysia and is available in almost any coffee shop aka kopitiam. Seriously, I can’t recall when the last time I had Kaya toast. Well, kaya toast can be found in some Malaysian restaurants such as PappaRich and Old Town in Melbourne. One can also buy the kaya jars from Asian grocers. However, to me, those kaya aren’t the same as homemade kaya. In my opinion, homemade kaya tends to be richer in flavours, probably because of the quality of the ingredients.

My mum used to make kaya at home when I was young. I remembered it was a tedious process where constantly stirring for hours is inevitable. Hence, it never occurred to me to make my own kaya until I saw this 10-minute kaya recipe from Kitchen Tigress. It’s good to know that there are a few tweaks to shorten the cooking time such as using egg yolks only instead of whole eggs as well as substituting part of the sugar with palm sugar. I added an extra egg yolk and reduced the sugar from the existing recipe. Well, it took me about 20-25 minutes in total from preparation until the kaya is cooked to my preferred texture. 

Easy homemade kaya recipe
Since then, I have ensured that there’s always a jar of homemade kaya available in my fridge! :)

Recipe: 

(to make a bowl, about 170g jar)

5 egg yolks
4 pandan leaves
200ml coconut milk
40g palm sugar
35g castor sugar

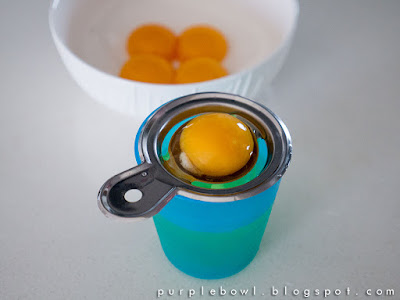
1. Separate the egg yolks from the egg whites. Try to ensure that there isn’t any egg white. Otherwise, the texture of the kaya won’t be as smooth and might be a bit lumpy if it’s cooked over high heat. This is why those recipes with egg whites require cooking over a water bath.

2. Wash the pandan leaves and cut each leaf into 4 parts.

3. Put pandan leaves, coconut milk, palm sugar and castor sugar into a pot. Cook over medium heat until the palm sugar is melted and the mixture starts to simmer. Remove the pot from the heat.

4. Gently mix the egg yolks in a bowl and slowly mix in half of the coconut milk mixture from the pot.

5. Pour the mixture in the bowl back to the pot.

6. Return the pot to the stove. Constantly stirring the mixture over medium heat until it starts to thicken.

7. Reduce to low heat and keep stirring until the kaya is thickened or to your preferred thickness. I like it slightly thicker and it took me about 15mins to get to my preferred texture.

8. Cool the kaya. Transfer the cooled kaya into a jar and store in the fridge. Used within a week. 

Easy homemade kaya recipe
Homemade kaya recipe
Homemade kaya


Sunday, August 23, 2015

Green tea muffins recipe

I'm not sure if I'm addicted to baking or the smell of baking. Well, I'm excited to see cake rise in the oven. I'm even more delighted to fill my home with the smell of baking just like a bakery shop. Haha. I believe I'm not alone!

On a busy day, I'd simply bake something quick such as muffins so that my little one's tea break and my breakfast on the following days are catered for.

Green tea muffins recipe
Green tea chocolate chips muffins recipe

Following the vanilla cupcakes, I found this lovely Chocolate chips green tea muffins recipe from Eugenie Kitchen. It's a very simple recipe. After some modifications to enhance the green tea flavor as well as making the texture lighter by replacing a portion of flour with cake flour, it's simply the best muffins I've baked. 

Recipe:

(12 muffins)

100g all purpose flour
150g cake flour
1 1/2 tablespoons green tea powder
3 teaspoons baking powder
1 egg
100g caster sugar
1/4 teaspoon salt
1 teaspoon vanilla extract
95ml vegetable oil
190ml milk
45g dark chocolate chips
30g white chocolate chips

1. Sift all the dry ingredients (all purpose flour, cake flour, green tea powder and baking powder) into a mixing bowl. Mix well and set aside. 

2. In a separate mixing bowl, beat egg, sugar and salt until pale in color. 

3. Add in vanilla extract and vegetable oil. Whisk until combine. 

4. Add in milk and mix well. 

5. Now, back to the dry ingredients mixing bowl. Make a well in the center of the dry ingredients, pour in the wet mixture and gently fold until almost combined.

6. Add in dark and white chocolate chips and fold until just combined. Do not over fold/mix. 

7. Line patty pans or cupcake cases on a cupcake pan. 

8. Scoop the batter onto the patty pans evenly, about 1/2 full each. 

9. Bake in a pre-heated oven at 170c for about 15mins or until the inserted skewer comes out clean. 

10. Cool cupcakes on a wire rack. 

Green tea muffins recipe
Chocolate chips green tea muffins recipe
Chocolate chips green tea cupcake recipe

Wednesday, August 12, 2015

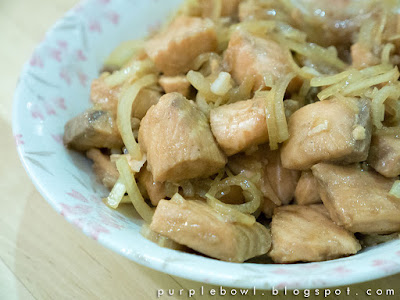
Simple salmon stir fry recipe

Fish is a vital source of omega-3 fatty acids and it's low in fat as well as high in protein. Hence, I ensure my family have fish at least once a week. Given that I'm not a fish person, salmon is probably the only fish I like as other fish species tend to taste fishy most of the time. Tasmanian Atlantic salmon is the kind of salmon I use to get. It's rich in essential vitamins and minerals as well as omega-3 fatty acids. Besides that, I found that it has the best texture among the salmon species. 

Simple salmon stir fry recipe

I created this recipe while I was trying to reproduce the seared Atlantic salmon from MissChu. Well, it didn't turn out like MissChu's but I kind of like my version more. It's the simplest salmon stir fry recipe I have cooked. It has the right balance of flavor and the lemon simply brings out the flavor in the salmon! If you're a busy bee and would like a quick healty meal at home, this is the recipe for you. 

Recipe: 

(2 servings)

400g fresh Tasmanian Atlantic salmon (skin off)
1 big onion
1/2 lemon
2 tablespoons oil (I used rice bran oil)

Marinade:
1 tablespoon oyster sauce
1 tablespoon sweet soy sauce (kecap manis)
1 teaspoon light soy sauce
A pinch of salt
1/4 teaspoon white pepper

1. Cut salmon into bite-size dices. 

2. Marinate diced salmon with the marinade for about 30mins. 

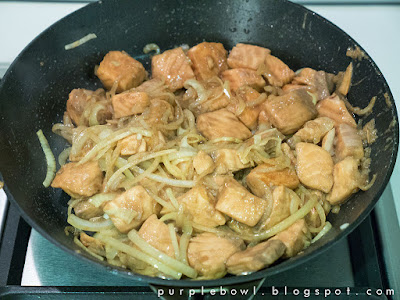
3. Heat oil in a frying pan. Add in onion and stir fry until the onion is soft.

4. Add in salmon together with the marinade. Stir fry until the salmon is almost cooked. 

5. Squeeze the juice of the lemon onto the salmon. Gently toss the salmon. 

6. Remove frying pan from the heat once the salmon is cooked. Do not overcook the salmon. 

7. Serve with rice while it's warm. 

salmon stir fry recipe
simple salmon stir fry recipe
stir fry salmon recipe
Easy stir fry salmon recipe
Salmon recipe

Wednesday, August 5, 2015

Lin Chee Kang (lotus seed dessert) recipe

One thing I like about Chinese desserts is that they're very easy to make. Often, they're full of goodness too. Lin Chee Kang (aka lotus seed dessert) is a good example. 

Lin Chee Kang recipe

The best Lin Chee Kang I had in Malaysia was from a dessert stall at Wai Sek Kai, SS2 in Petaling Jaya (PJ). Not sure if this stall still exists as it was almost a decade ago since my last visit. 

I haven't tried any Lin Chee Kang in Melbourne although there are a number of Asian dessert stalls. Hence, I can't say which is the best. Well, given that it's so easy to make, I decided to make it at home instead ;) There's no problem in getting all the required ingredients in Melbourne. They should be easily available from an Asian grocer. Below is my version of Lin Chee Kang. It's so simple and yet delicious. 

Recipe: 


1 big White fungus/snow ear fungus
Red dates*
Dried longan*
Lotus seeds*
Goji berries*
Lily Bulbs*
Rock sugar
2 litres Water

*About a handful each

1. Soak white fungus/snow ear fungus with water until soft. Wash and rinse with water. 

2. Wash and rinse red dates, dried longan, lotus seeds, goji berries and lily bulbs with water. 

3. Bring the 2 litres of water to boil in a pot. 

4. Add in all the ingredients except rock sugar and bring it to boil. 

4. Reduce to low heat and simmer for 1-2 hours.

5. Add in rock sugar according to the sweetness of your liking. Cook until the rock sugar is fully melted.

6. Serve while it's warm. 

Lin Chee Kang recipe
Lotus seed dessert recipe

Thursday, July 23, 2015

Baked Chinese egg cake (ji dan gao) 烤鸡蛋糕 recipe

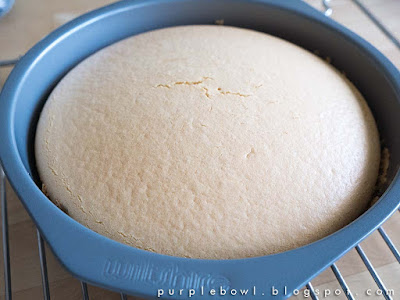
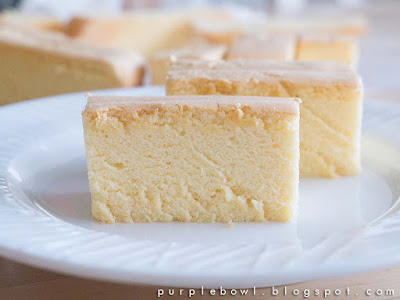
Chinese egg cake, also known as Ji Dan Gao in Mandarin is a kind of sponge cake with only 4 ingredients (probably this is the only recipe that I could remember). As the flavour comes from the eggs, using good quality free range eggs is quite important.

Chinese egg cake recipe

The following recipe which I got from Bake for Happy kids with minor modification is for baking instead of steaming. I'm not sure if it will yield the same result if it was steamed. Maybe someone can try and let me know :P

Recipe: 

(original recipe asked for a 5-6 inch round cake tin, but I used a 8 inch round cake tin which resulted in a shorter cake)

3 egg yolks
1 egg
50g corn oil
65g self raising cake flour (mix 65g cake flour with 1/2 tsp baking powder if you don't have self raising flour)

3 egg whites
50g icing sugar

1. Beat egg yolks and egg in a mixing bowl with a hand whisk.

2. Add in corn oil and stir to combine.

3. Sift in self raising cake flour and mix well. Leave the egg yolk mixture aside.

4. Beat the egg whites in another mixing bowl.

5. Gradually add in the sugar when the egg whites start to thicken. Beat until firm peak stage.

6. Loosen the egg yolk mixture by slowly stirring the mixture from the bottom of the mixing bowl using a whisk.

7. Add the egg white mixture onto the egg yolk mixture in 3 batches. Mix until they are almost combined on each addition. Lastly, scrape down and fold until everything is evenly combined.

8. Line cake pan with parchment paper. Pour batter onto the cake pan and spread the batter evenly. Lightly bang the cake pan on the table top a few times to release the air bubbles.

9. Bake in a pre-heated oven at 160c for about 30mins or until the inserted skewer comes out clean.

10. Remove the cake from the tin and let it cool on a wire rack.

Baked Chinese sponge cake recipe
Baked ji dan gao recipe
Ji dan gao recipe

Thursday, June 4, 2015

Airfry grilled chicken thighs recipe

Airfryer is my great kitchen buddy nowadays. And it works really well on meat! I've been making some quick and easy grilled chicken for dinner when I'm busy. What you really need is to prepare the meat and leave the rest of the job with the Airfryer. How easy?!

Grilled chicken thighs recipe

Well, so I thought I'd share this easy and yummy grilled chicken thighs recipe. The chicken thighs were cooked in just 12 mins at 180c in my Philips Airfryer. My oven would probably take about 18-20mins to get the same browning effect. 

Other than the shorter cooking time, the meat was cooked to perfection too. The chicken thighs were nicely brown and the meat was tender as well as juicy!

Recipe: 


2 skinless chicken thighs 
1-2 sprigs of fresh rosemary
3 sprigs of fresh parsley
A generous sprinkle of garlic powder (all over the chicken thighs)
sprinkle of chilli flakes (adjust according to your liking)
1/2 lemon 
salt and pepper to taste

1. Rinse the chicken thighs with water and pat dry them with towel paper. 

2. Remove the rosemary leaves from the sprigs and discard the sprigs. 

3. Chop or mince the fresh parsley. 

4. Marinate the chicken thighs with parsley, rosemary leaves, garlic powder, chilli flakes, lemon juice, salt and pepper for at least an hour or longer for better flavour. I marinated the chicken overnight in the fridge. 

5. Grill for about 12 mins or until brown in a pre-heated airfryer at 180c. Adjust the timing accordingly as the size or thickness of the chicken thighs used are different.

6. Serve while it's warm.    

Airfry grilled chicken thighs recipe

Tuesday, June 2, 2015

Airfried sweet potato recipe

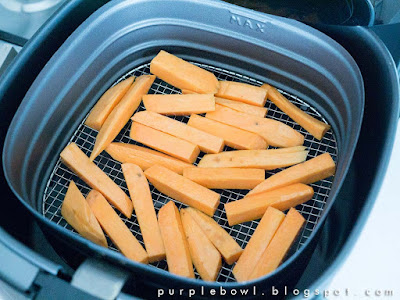
I finally bought a Philips Airfryer XL! Looks like I'll need a bigger kitchen if I'm to get any more new appliances from now on as this new gadget is taking up a lot of space.

What's the first food you cooked with your airfryer? Mine was sweet potato fries! Strange choice? Well, I fell in love with sweet potato fries ever since I ordered it from Roll'd - a Vietnamese food chain in my office building. I would usually order a side sweet potato fries to accompany my lunch meal. Therefore, I want to create a healthier version of sweet potato fries that I could eat it everyday! :)

Airfry sweet potato

The verdict? I must say that the airfryer is a fantastic invention. The freshly cut sweet potato was turned into crunchy fries in just 12 mins with little to no oil! Of course, the healthier airfried version differs from the normal deep fried version but it's close. It's crispy on the skin but without the oil taste that you get from deep-frying in oil. I think it is a very good alternative to enjoy a healthier version of "fried" food. 

Besides that, I love the cleaning part too. You just need to wash the basket and the pan. Both parts are dish washer safe. So far, the interior of the appliance had no food residues after my cooking. Hence, I merely wiped it using a damped cloth.


Recipe:


1 big sweet potato 
1/2 tablespoon oil (I used rice bran oil)

1. Cut sweet potato into strips. 

2. Put the sweet potato strips in a ziplock bag. Add in oil, ziplock it and shake so that each strip is coated with oil.

3. Place the sweet potato fries onto the basket of the airfryer. Airfry for about 12 mins in a pre-heated airfryer at 180c.

Airfry sweet potato

Airfry sweet potato

Sweet potato fries

Friday, January 9, 2015

Chee cheong fun sweet sauce recipe

Ready made chee cheong fun or rice rolls can easily be found at any Asian supermarkets in Melbourne. It's so convenient that one just need to steam or heat up the rolls before serving. Besides that, most of them are quite good with nice texture and the right thickness. Some of them even come with filling inside the rolls. However, these chee cheong fun don't come with any sauce. Hence, it's up to you to create your own sauce. 

There are various types of chee cheong fun and sauces available in Malaysia. Basically, there are the Hong Kong style light soya sauce chee cheong fun, the Penang style shrimp paste chee cheong fun and the general sweet sauce chee cheong fun that one could find in KL. 

I couldn't get the right sauce for my chee cheong fun until someone kindly shared this lovely sweet sauce recipe on a forum. It tastes just like those in KL! Ever since then, I could always enjoy a perfect plate of sweet sauce chee cheong fun at home. 

Chee cheong fun sweet sauce recipe

By the way, I like to top my chee cheong fun with some yong tau foo (stuffed vegetables/tofu) and various fishballs. Don't be surprised that yong tau foo can be found in Melbourne too. I often get the frozen yong tau foo from Hometown Asian supermarket. Sometimes I think that we're spoilt living in Melbourne as Malaysian food and groceries are easily available. 

Recipe:


3 tablespoons hoisin sauce
2 tablespoons sesame sauce
1 teaspoon thick black caramel sauce
1 teaspoon soya sauce
2/3 tablespoon peanut butter
Sugar - according to your required sweetness
3 tablepoons hot water

1. Mix all the ingredients above in a bowl and stir well.

2. Microwave it for 1.5 minutes. 

3. Remove from the microwave and stir until everything is combined. 

4. Add additional water if needed to your desired thickness.

Chee cheong fun sweet sauce recipe
sweet sauce recipe
Chee cheong fun recipe

Tuesday, December 30, 2014

Easy pork patty recipe

Christmas season is a great time for family reunion. I'm glad that my family was able to spend time with me in Melbourne this time. I'm even happier that I could enjoy some of my mum's home cooked meals at home ;) Thus, I took this opportunity to note down some of the easy recipes such as this easy pork patty recipe.

Easy pork patty recipe

This is a Chinese version of pork patty but I reckon it would go well with fresh salads and buns in addition to rice. Feel free to modify the amount of seasoning according to your taste buds.

Recipe:

(3-4 servings)

500g pork mince
A handful of chopped spring onions
1 egg yolk
Oil ( sufficient to pan-fry the patty)

Marinade:

1 teaspoon corn flour
1 1/3 tablespoons oyster sauce
1 tablespoon light soya sauce
A few dashes of white pepper
1 tablespoon shaoxing wine
1/2 teaspoon five spice powder
3/4 teaspoon sesame oil
1/2 teaspoon salt

1. Combine pork mince, spring onions, egg yolk and the marinade in a bowl and mix well.

2. Take a small scoop of the pork mixture, roll into a ball and gently flatten it into a round patty. Transform all the pork mixture into patties by repeating this step.

3. Heat oil in a frying pan. Pan fry the pork patties until they're cooked and turn brown.

4. Serve while it's hot.

Suggestion: Serve the pork patties with Kewpie mayonnaise.


Easy pork patty recipe
Asian pork patty recipe
Chinese pork patty recipe

Wednesday, December 17, 2014

Easy green curry recipe

Green curry is my favorite Thai curry among the various Thai curries. Green curry is a popular dish that can be found in any Thai restaurant in Melbourne. However, most of the time the spiciness has been significantly toned down to suit the local taste buds. 

green curry recipe

It's easy to make your own green curry at home by using the ready made green curry paste. However, I found that most of the ready made green curry pastes sold in the supermarket weren't great until I was introduced to Marion's Kitchen Thai green curry! It is full of flavour and I reckon it is as good as you could get from an authentic Thai restaurant. 

Marion's Kitchen is a collection of Asian ingredient kits based on the traditional recipes created by Marion Grasby who is a Thai-Australian cook and was one of the favourites in MasterChef Australia, Season 2. These products can be found in major supermarkets such as Coles and Woolworths. 

Easy green curry recipe

Marion's Kitchen Thai green curry kit comes with an easy step-by-step guide as well as the ingredients such as the green curry paste, coconut milk, dried herbs/spices, fish sauce and bamboo shoots. Each sachet is numbered and labelled which is very handy. What you need to do is to add in the meat, seafood and vegetables based on your preference. 

Recipe: 

(4 servings)

1 Marion's Kitchen Thai green curry kit
1-2 tablespoons oil
1 cup water
500g Sliced chicken and prawn cutlets (you can use any meat and or seafood)
A handful of green beans (you can use any vegetables that go well with green curry)
1 sliced carrot

1. Heat oil over medium heat and stir fry the green curry paste for about a minute or until you can smell the aroma.

2. Pour in the coconut milk and water.

3. Add in dried herbs and chillies, follow by fish sauce. Cook until the curry starts to simmer. 

4. Add chicken and cook until tender.*

5. Drain the liquid from the bamboo shoots. Add in bamboo shoots, prawn cutlets, green beans and carrot. Simmer for about 5 minutes and until the prawns and the vegetables are cooked. 

6. Serve while it's hot. 

* It depends on what texture you like for the meat you use. Feel free to modify the timing as you like. You can add the meat together with the bamboo shoots and vegetables as per the instruction on the box. To me, I prefer my chicken to be tender soft and the prawns to be just cooked :)

Easy green curry recipe
Marion's Kitchen Thai green curry