Showing posts with label Product reviews. Show all posts

Tuesday, June 2, 2015

Airfried sweet potato recipe

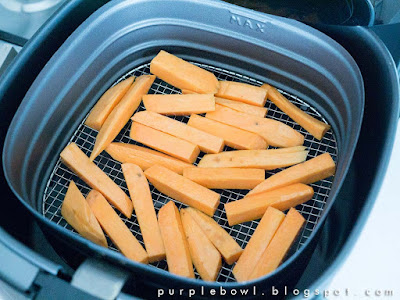
I finally bought a Philips Airfryer XL! Looks like I'll need a bigger kitchen if I'm to get any more new appliances from now on as this new gadget is taking up a lot of space.

What's the first food you cooked with your airfryer? Mine was sweet potato fries! Strange choice? Well, I fell in love with sweet potato fries ever since I ordered it from Roll'd - a Vietnamese food chain in my office building. I would usually order a side sweet potato fries to accompany my lunch meal. Therefore, I want to create a healthier version of sweet potato fries that I could eat it everyday! :)

Airfry sweet potato

The verdict? I must say that the airfryer is a fantastic invention. The freshly cut sweet potato was turned into crunchy fries in just 12 mins with little to no oil! Of course, the healthier airfried version differs from the normal deep fried version but it's close. It's crispy on the skin but without the oil taste that you get from deep-frying in oil. I think it is a very good alternative to enjoy a healthier version of "fried" food. 

Besides that, I love the cleaning part too. You just need to wash the basket and the pan. Both parts are dish washer safe. So far, the interior of the appliance had no food residues after my cooking. Hence, I merely wiped it using a damped cloth.


Recipe:


1 big sweet potato 
1/2 tablespoon oil (I used rice bran oil)

1. Cut sweet potato into strips. 

2. Put the sweet potato strips in a ziplock bag. Add in oil, ziplock it and shake so that each strip is coated with oil.

3. Place the sweet potato fries onto the basket of the airfryer. Airfry for about 12 mins in a pre-heated airfryer at 180c.

Airfry sweet potato

Airfry sweet potato

Sweet potato fries

Wednesday, December 17, 2014

Easy green curry recipe

Green curry is my favorite Thai curry among the various Thai curries. Green curry is a popular dish that can be found in any Thai restaurant in Melbourne. However, most of the time the spiciness has been significantly toned down to suit the local taste buds. 

green curry recipe

It's easy to make your own green curry at home by using the ready made green curry paste. However, I found that most of the ready made green curry pastes sold in the supermarket weren't great until I was introduced to Marion's Kitchen Thai green curry! It is full of flavour and I reckon it is as good as you could get from an authentic Thai restaurant. 

Marion's Kitchen is a collection of Asian ingredient kits based on the traditional recipes created by Marion Grasby who is a Thai-Australian cook and was one of the favourites in MasterChef Australia, Season 2. These products can be found in major supermarkets such as Coles and Woolworths. 

Easy green curry recipe

Marion's Kitchen Thai green curry kit comes with an easy step-by-step guide as well as the ingredients such as the green curry paste, coconut milk, dried herbs/spices, fish sauce and bamboo shoots. Each sachet is numbered and labelled which is very handy. What you need to do is to add in the meat, seafood and vegetables based on your preference. 

Recipe: 

(4 servings)

1 Marion's Kitchen Thai green curry kit
1-2 tablespoons oil
1 cup water
500g Sliced chicken and prawn cutlets (you can use any meat and or seafood)
A handful of green beans (you can use any vegetables that go well with green curry)
1 sliced carrot

1. Heat oil over medium heat and stir fry the green curry paste for about a minute or until you can smell the aroma.

2. Pour in the coconut milk and water.

3. Add in dried herbs and chillies, follow by fish sauce. Cook until the curry starts to simmer. 

4. Add chicken and cook until tender.*

5. Drain the liquid from the bamboo shoots. Add in bamboo shoots, prawn cutlets, green beans and carrot. Simmer for about 5 minutes and until the prawns and the vegetables are cooked. 

6. Serve while it's hot. 

* It depends on what texture you like for the meat you use. Feel free to modify the timing as you like. You can add the meat together with the bamboo shoots and vegetables as per the instruction on the box. To me, I prefer my chicken to be tender soft and the prawns to be just cooked :)

Easy green curry recipe
Marion's Kitchen Thai green curry

Thursday, December 4, 2014

Healthy green smoothie recipe

Summer is here! Longing for a glass of smoothie on a hot day? There are a lot of smoothie shops around Melbourne city and Five Plus on Little Lonsdale St in particular is my favourite. Actually, it’s not hard to make yourself a glass of healthy smoothie at home too. What you really need is a good blender that’s able to blend ice easily and of course, the required ingredients. I recently bought an Omniblend V 2 litre blender so I thought I should put it to the test by making smoothie. The blender is amazingly efficient that the ice was crushed in seconds and the smoothie was done in less than 10 seconds with high speed! It was indeed a good buy.

Healthy green smoothie recipe

Well, I used to have fruits only smoothie until I found my love for kale. Yes, the very high nutritional value vegetable – kale! If your kid is not into vegetables, it is probably a good idea to offer them a glass of yummy green smoothie instead. Below is a nice green smoothie recipe I modified from the smoothie I had at Five Plus. In fact, you could always modify the smoothie by adding the fruits you like.

Green smoothie ingredients

Recipe:

(4 servings)

3-4 leaves of kale
5 leaves of mint
1 banana
1 mango
1 apple
4-5 small slices of pineapple
1/2 lime
1 1/2 cups almond milk
2 trays or about 24 small ice cubes

1. Wash kale and mint leaves. Cut the fruits.

2. Place kale, mint, banana, mango, apple, pineapple, lime juice and almond milk into the blender. Blend until everything is combined.

3. Add in ice cubes and blend until smooth.

Omniblend V 2 litre blender
Healthy green smoothie recipe
Kale smoothie recipe

Monday, September 22, 2014

Easy homemade chicken satay recipe

Satay is a popular delicacy in South East Asia. In Malaysia, satay stalls can easily be found in many hawker centers, on the street as well as at night markets a.k.a pasar malam in Malay. Satay is a dish where well marinated meat skewers are grilled and served with peanut sauce. It's usually accompanied by diced cucumbers, onions and ketupat (rice cake). In Melbourne, a number of Malaysian restaurants such as Paparich, The Mamak and Little Ipoh offer scrumptious satays in their menu. There's also a famous Indonesian satay restaurant called Kedai Satay in the city and South Yarra.

Easy homemade chicken satay recipe

Making your own satay from scratch require quite substantial effort. The list of spices/ingredients for the marinade and the peanut sauce actually put me off. However, I did come out with homemade chicken satay in the end. And it was easy because I used a ready made satay making kit!

Easy homemade chicken satay recipe - Prima taste ready made satay sauce

Well, I stumbled upon this box of satay kit when I was browsing the Malaysian/Singaporean food aisle at Hometown Asian Supermarket on Elizabeth Street. This ready made satay marinade and peanut sauce are actually from Singapore, produced by Prima Taste. It has no MSG too. Thus, I thought of giving it a try.

Easy homemade chicken satay recipe - ketupat or rice cakes

Since I was going to make satay, I bought a packet of Nona brand ketupat rice too. There are multiple mini rice packets that could be boiled into ketupat (rice cakes).

Easy homemade chicken satay recipe - grilling satay in oven

Making satay suddenly becomes so simple thanks to the ready made marinade and satay sauce. One just need to follow the instructions on the packet. I did add a pinch of salt to the chicken though. Besides that, I used the oven's grill function to grill the satay instead of using an electrical grill or BBQ set as it is easier to clean.

What's the verdict you may ask. It was amazingly good! I reckon the satay made from using Prima Taste's marinade and peanut sauce is comparable to Little Ipoh's. Voila! I could make satays too!

Recipe:
(2 servings)

1 box of Prima Taste satay kit - contains marinade, satay sauce mix and peanut paste.
400g chicken thighs
A pinch of salt
Vegetable oil for brushing the satay
4 Nona mini rice packets
1 cucumber
150ml water for making the sauce as per instruction
Bamboo sticks (the number of sticks required is dependent on how big each satay you make. The box says use 350g of meat for 24 sticks. I only managed to make 10 sticks using 400g of chicken!)

1. Cut chicken into small cubes. Marinate the chicken with the marinade from the box and a pinch of salt. Keep in the fridge overnight.

2. Cook the mini rice packets as per instructions on the packet and cut into cubes. It takes 60-90 mins. So make sure you start this earlier as it needs to be cooled before you could cut them into cubes.

3. Cut cucumber into cubes and keep aside.

4. Thread the chicken meat using the bamboo sticks. Brush oil on each side of the chicken sticks.

5. Grill in pre-heated oven at 220-240c for 5mins. Flip each satay stick and grill for another 3-4 mins at 220-240c. Adjust the temperature from time to time so that the satay is not too burnt.
6. While grilling the satay in the oven, start making the peanut sauce by following the instructions on the box.

7. Serve satay with peanut sauce, ketupat (rice cakes) and cucumbers.

Easy homemade chicken satay recipe - grilling satay in oven

Easy homemade chicken satay recipe - satay and sauce


Saturday, September 20, 2014

Kitchen scale

Not sure how many people are still using an analog kitchen scale in a digital world today. I was one of them (if I'm not the last) until very recently when I finally bought a digital kitchen scale. Yes, I'm not kidding!

Analog kitchen scale

Before I introduce you to my new digital kitchen scale, I should give credit to my old analog kitchen scale. My analog kitchen scale was actually a free gift from My Chemist. It had served me well for many years that I reckon it should get a long service medal. Its achievements during these years are countless. It certainly played an important role in filling our tummies with all the yummy cakes and cookies that I baked. So I think it's a good time for a retirement. Wait, I'm not giving it away just in case the digital one fails! Who knows?

Digital kitchen scale with glass surface

Well, I always wanted to get a digital kitchen scale but I just don't really have the time to search for one. ALDI recently had a baking ware sale and the digital kitchen scale was only $9.99! I thought it was cheap and thus, I just bought one without any hesitation.

Digital kitchen scale - measuring functions

There were a number of designs to choose from and I decided on a glass surface as it looks classy and I reckon it is easier to clean. The digital kitchen scale comes with 3 measuring functions namely measuring weight in g or lb.oz, measuring water in ml or fl.oz as well as measuring milk in ml or fl.oz. 

Digital kitchen scale - tare function

Besides that, there's a tare function where one could weigh ingredients using a container without including the weight of the container. How convenient!

The digital kitchen scale certainly makes my life easier now. Well, I suppose there's no more excuses for inaccurate weights of ingredients if the recipes don't work now :p

Saturday, September 13, 2014

Easy oven-steamed emperor herbs chicken recipe

Emperor herbs chicken is a Chinese dish where herbs stuffed and marinated chicken is wrapped by layers of parchment paper and aluminium foil before steaming for hours. This cooking method helps to produce juicy and tender chicken with tasty herbs broth. Apparently, this dish was named after an emperor's favourite dish and thus, emperor herbs chicken. Thankfully we don't need to be an emperor to enjoy this dish today!

Easy oven-steamed emperor herbs chicken recipe

It's not difficult to create this dish from scratch, you just need to gather all the required herbs such as dong quai (chinese angelica), liquorice, codonopsis, ginseng root, red dates and goji berries. However, I chose to use the ready made packet which consists of all the main herbs except red dates and goji berries. The ready made emperor herbs chicken packet usually comes with a packet of herbs/spices as well as a plastic wrap that can be steamed and a sheet of aluminium foil.

Easy oven-steamed emperor herbs chicken recipe  - House of Yi emperor herbs chicken

There are a number of brands producing emperor herbs chicken packets. These packets can be easily found at Asian supermarkets which carry Malaysian or Singapore products such as Hometown Asian Supermarket on Elizabeth Street as well as Laguna at QV. So far, I have tried the A1 brand (from Malaysia) and House of Yi (from Singapore). I prefer the later as House of Yi's herbs are not 100% grounded into powder. You can still see the herbs in small bits. It also has a stronger herbs taste as compared to the A1 brand.

By following the cooking instruction on the packet, the chicken is to be steamed for 2 to 2.5 hours. That's a tad long for me and thus, I decided to cook it using the oven-steam method like how I cooked the oven steamed chicken previously. With oven, the cooking time is significantly reduced to 1.5 hours. It's important to replace the plastic wrap with parchment paper if you're using an oven! Otherwise, the plastic wrap might melt, causing a health hazard.

Recipe:

(4-6 servings)

1 whole chicken
1 emperor herbs chicken packet
A handful of red dates without seeds
A handful of goji berries
1/2 cup of water (if you would like to have more broth)

1. Lay aluminium foil follow by sufficient parchment paper on kitchen top.
Warning: do not use the plastic wrap as supplied if you're using an oven.

2. Wash the chicken and rub the herbs all over the chicken.

3. Wash and rinse red dates and goji berries before stuffing them into the chicken. You could leave a few on the chicken.

4. If you're looking for more broth, pour 1/2 cup water into the stomach of the chicken where the red dates and goji berries are stuffed.

5. Wrap the chicken tightly with parchment paper, follow by aluminium foil.

6. Bake for 1.5 hours at 190c. Rest the chicken in the oven for about 10 mins once it's done.

7. Cut the chicken and serve.

Easy oven-steamed emperor herbs chicken recipe - red dates and goji berries
Easy oven-steamed emperor herbs chicken recipe - stuff chicken with herbs
Easy oven-steamed emperor herbs chicken recipe

Friday, August 22, 2014

Easy Nasi Lemak 椰浆饭 recipe

Nasi Lemak is another Malaysian delicacy. You can find it in most Malaysian restaurants in Melbourne. It's basically coconut rice serve with sambal, fried ikan bilis (dried anchovies), peanuts, cucumbers, egg accompanied by a protein dish such as fried chicken, fried fish or curry chicken. Do you know that the recent winner of UK Masterchef 2014, Ping Coombes, actually won the title by serving this dish? Naturally, she brought this dish to the next level. Her Nasi Lemak was very pretty.

Easy Nasi Lemak

To really cook this dish with all the side dishes from scratch is very time consuming. I called it an easy recipe because I am using some ready made ingredients which I think is just as good if not better! More importantly, it saves a lot of time if you're a busy bee like me.

Easy Nasi Lemak - sambal chilli

Well, first of all I use a ready made sambal. After trying a few brands, I reckon Singlong brand Nasi Lemak sambal chilli is the best. It is available at Laguna at QV and Hometown Asian supermarket on Elizabeth Street in the city.

Easy Nasi Lemak - Lilydale chicken wing nibbles

Instead of making my own chicken dish, I choose Lilydale's free range chicken wing nibbles. They're marinated with lemongrass and ginger. The flavour is very suitable to eat with Nasi Lemak. Besides that, it's grilled instead of fried which is much healthier. Moreover, it is super tasty!

Easy Nasi Lemak - baked ikan bilis

Besides that, the ikan bilis is baked in the oven rather than fried. It is again healthier and oil free. You can always bake the crispy ikan bilis in advance and store it in a jar. It comes in handy when you need it later as it can be used for garnishing on other dishes too such as pan mee or mee hoon kueh.

Recipe:

(4-6 servings)

For the rice: 

3 cups rice
3 pandan leaves
1 box of 200ml coconut milk
Water
Salt to taste

Side dishes:

1 tablespoon oil
1 onion
2/3 jar of Singlong brand Nasi Lemak sambal chilli
Handful of Ikan bilis
1 Cucumber
4 eggs
1 packet Lilydale free range chicken wing nibbles

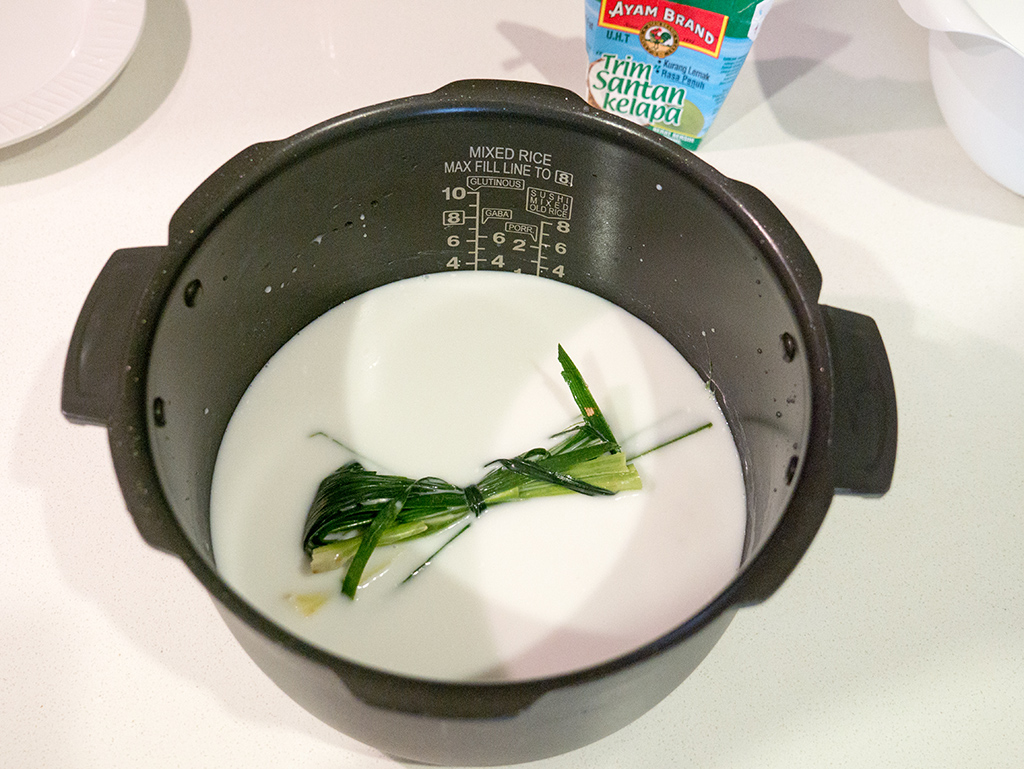
1. Wash the rice and put it in the rice pot. Add coconut milk, follow by water until it reaches the level for 3 cups of rice as indicated on the rice pot. Add pandan leaves and salt to taste. Cook the rice using the normal rice setting.

2. Boil eggs in the water until hard boiled. Removed the shells when cooled and leave them aside.

3. Wash ikan bilis and pat dry them using paper towel. Spread them evenly on a baking tray. Bake at 180c for about 10-15mins or until brown. Leave it aside.

4. Slice cucumber and leave it aside.

5. Slice onion. Heat oil on frying pan. Stir fry onion until slightly soft. Add in Singlong Nasi Lemak sambal chilli, mix well and cook until the onion is cooked. Leave it aside.

6. Follow the instruction on the packaging and oven grill the Lilydale chicken wing nibbles.

7. Assemble the rice and all the side dishes (sambal with onion, ikan bilis, egg, cucumber and chicken) on a plate and serve.

Easy Nasi Lemak - ingredients for cooking coconut rice

Easy Nasi Lemak - adding coconut milk to the rice

Easy Nasi Lemak - coconut rice

Easy Nasi Lemak - sambal with onion

Easy Nasi Lemak - sambal with onion

Easy Nasi Lemak - sambal with onion

Easy Nasi Lemak