Thursday, August 6, 2015

Vanilla cupcakes recipe

I'm a cupcake lover. I used to buy cupcakes from the local bakery and still do once in a while until I started baking my own cupcakes. If you ask me where to find the best cupcakes in Melbourne, I'd certainly recommend Joy Cupcakes without hesitation. At Joy Cupcakes, every cupcake is beautifully made and comes with various interesting flavors. Often, there'll be a special cupcake flavor available for a limited time to celebrate an occasion/event. The cupcakes produced by Joy Cupcakes are light and moist. And most importantly, with the perfect sweetness. Unlike the sweet icing on a typical cupcake, the meringue buttercream frosting from Joy Cupcakes is something one can't resist. Hence, it's worth to check it out if you're near any of their outlets.

Because of this, I was intrigued to find out the secret to a great tasting cupcake. Well, at least for the base white/vanilla cupcake that could go with any frosting. So, I've been trying new vanilla cupcake recipes every now and then. 

Vanilla cupcakes recipe
Vanilla cupcake
basic cupcake recipe

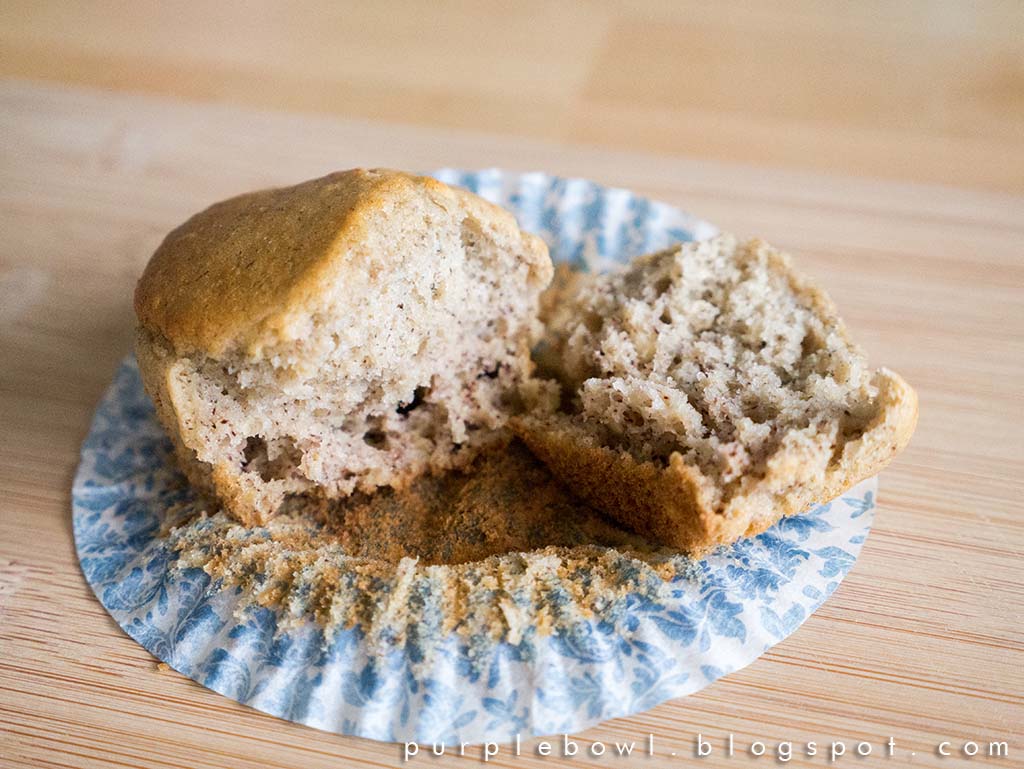
Recently, I found this basic cupcake recipe from Eugenie Kitchen and I quite like the light and fluffy texture. Although it doesn't taste exactly like those from Joy Cupcakes, I'll settle for this recipe for now :) Note that I've reduced the sugar and salt from the original recipe to adapt to my taste buds. If you like a bit of chocolate flavor, fold in some dark chocolate chips before scooping the batter onto the patty pans or cupcake cases. They taste good too.

Chocolate chips cupcakes recipe


Recipe: 

(make 16 cupcakes)

128g all-purpose flour
150g cake flour
5 teaspoons baking powder
1/4 teaspoon Salt
200g unsalted butter
130g Caster sugar
3 Eggs
1 teaspoon vanilla extract
120ml milk

1. Sift all-purpose flour, cake flour, baking powder and salt into a mixing bowl. Whisk and mix well. 

2. Beat butter and sugar in another mixing bowl until pale and fluffy.

3. Add in eggs, one at a time. Beat thoroughly after each addition. Beat on a higher speed after the last addition until everything is well combined.

4. Fold 1/3 flour mixture onto the batter until combined. Add in 1/2 milk and fold until even. Repeat the same by folding in another 1/3 flour mixture and 1/2 milk, follow by vanilla extract and lastly the 1/3 flour mixture. 

5. Line patty pans or cupcake cases on a cupcake pan. 

6. Scoop the batter onto the patty pans evenly, about 2/3 full each. 

7. Bake in a pre-heated oven at 160-170c for about 15-20mins or until golden brown and that the inserted skewer comes out clean. 

8. Cool cupcakes on a wire rack. 

White cupcakes recipe
basic cupcakes recipe

Wednesday, August 5, 2015

Lin Chee Kang (lotus seed dessert) recipe

One thing I like about Chinese desserts is that they're very easy to make. Often, they're full of goodness too. Lin Chee Kang (aka lotus seed dessert) is a good example. 

Lin Chee Kang recipe

The best Lin Chee Kang I had in Malaysia was from a dessert stall at Wai Sek Kai, SS2 in Petaling Jaya (PJ). Not sure if this stall still exists as it was almost a decade ago since my last visit. 

I haven't tried any Lin Chee Kang in Melbourne although there are a number of Asian dessert stalls. Hence, I can't say which is the best. Well, given that it's so easy to make, I decided to make it at home instead ;) There's no problem in getting all the required ingredients in Melbourne. They should be easily available from an Asian grocer. Below is my version of Lin Chee Kang. It's so simple and yet delicious. 

Recipe: 


1 big White fungus/snow ear fungus
Red dates*
Dried longan*
Lotus seeds*
Goji berries*
Lily Bulbs*
Rock sugar
2 litres Water

*About a handful each

1. Soak white fungus/snow ear fungus with water until soft. Wash and rinse with water. 

2. Wash and rinse red dates, dried longan, lotus seeds, goji berries and lily bulbs with water. 

3. Bring the 2 litres of water to boil in a pot. 

4. Add in all the ingredients except rock sugar and bring it to boil. 

4. Reduce to low heat and simmer for 1-2 hours.

5. Add in rock sugar according to the sweetness of your liking. Cook until the rock sugar is fully melted.

6. Serve while it's warm. 

Lin Chee Kang recipe
Lotus seed dessert recipe

Thursday, July 30, 2015

Chocolate coconut butter cake recipe

To be honest, I've never been a fan of coconut flavor cake. However, when I saw the photos of the coconut and chocolate butter cake recipe by NasiLemakLover, I told myself that I must at least give it a go. I'm glad I did. It's such a beautiful butter cake! 

Chocolate coconut butter cake recipe

The coconut layer compliments the chocolate butter cake, making it a perfect combination. Never did I know that coconut goes so well with chocolate. As usual, I made some minor adjustments to the original recipe mainly to reduce the sweetness and make the coconut layer more subtle to suit my taste buds. 

Recipe: 

(8-inch square pan, but I used a 9-inch square pan)

230g unsalted butter (room temperature)
120g caster sugar
4 eggs 
1 teaspoon vanilla extract
210g self raising cake flour (or mix 210g cake flour with 1 1/2 teaspoons baking powder)
80ml milk

Coconut layer:
30g desiccated coconut

Chocolate layer: 
Mix 1 tablespoon cocoa powder with 1 1/2 tablespoons milk to form a cocoa paste.
20g dark chocolate chips

1. Beat butter and sugar in a mixing bowl until pale and fluffy.

2. Add in eggs, one at a time. Beat thoroughly after each addition. Add the vanilla extract with the last egg. Beat for another 1 minute after the last addition until everything is well combined.

3. Sift 1/4 self raising cake flour onto the batter and fold with a spatula until even. Repeat this step for another 1/4 self raising cake flour. 

4. Add half the milk and fold well. Sift in 1/4 self raising cake flour and fold until combine. Repeat the same for the remaining milk and the self raising cake flour. 

5. Divide the batter equally onto two mixing bowls. 

6. Fold desiccated coconut onto one part of the batter for the coconut layer. 

7. Fold the cocoa paste and dark chocolate chips onto the other part of the batter for the chocolate layer. 

8. Line cake tin with parchment paper. 

9. Pour chocolate batter onto the cake tin and spread evenly, follow by the coconut batter on top. 

10. Bang the cake tin on the table top a few times to release the big air bubbles.

11. Bake in a pre-heated oven at 160c for about 45 mins or until the inserted skewer comes out clean.

12. Remove the cake from the cake tin and let it cool on a wire rack.

Chocolate coconut butter cake
Chocolate coconut cake

Friday, July 24, 2015

Chocolate cake with mascarpone cream recipe

I've been baking a lot of sponge cakes lately. Therefore, I was looking for a soft and moist chocolate cake recipe for a change. After a long search, I finally found the soft and moist chocolate cake from Wendyinkk's blog with some alterations mainly to reduce the sweetness and making it lighter by using only cake flour. This chocolate cake is really soft even after it was kept in the fridge. I think it is a great cake base for any frosted birthday cake.

Chocolate cake with mascarpone cream recipe
Chocolate cake with mascarpone cream

Often, I would use some fresh fruits like strawberries to balance out the sweetness of a chocolate cake. In this instance, I've made a simple chocolate cake with strawberry filling and frosted it with mascarpone cream. It's a simple, yet yummy cake.

Recipe:

(20cm round cake tin)

33g Cocoa powder
59g Boiling water
75g Cake flour
1 teaspoon Baking powder
1/2 teaspoon Sodium bicarbonate
90g Sugar
1/8 teaspoon salt
2 Large egg yolks
54g Corn oil
1/2 teaspoon Vanilla extract
2 Large egg whites

1. Mix boiling water with cocoa powder in a mixing bowl to form a paste. Leave it aside to cool.

2. In a separate bowl, sift in cake flour, baking powder and Sodium bicarbonate. Add in sugar and salt. Mix well and leave it aside.

3. Back to the mixing bowl with cocoa paste, add in egg yolks and oil. Beat on medium speed for about 1 minute.

4. Add in vanilla extract and beat until combine.

5. Add in the dry ingredients, half at a time. Mix well on each addition. After that, beat on high speed for about 1 minute.

6. Add in egg whites and beat on high speed for another 2 minutes until all the ingredients are well incorporated.

7. Line parchment paper on the bottom of cake tin. Pour batter onto the cake pan and spread the batter evenly. Lightly bang the cake pan on the table top a few times to release the air bubbles.

9. Bake in a pre-heated oven at 160c for about 25-30mins or until the inserted skewer comes out clean.

10. Remove the cake from the cake tin and let it cool on a wire rack.


Mascarpone cream:

250g mascarpone
2 tablespoons castor sugar*
1 teaspoon vanilla extract
300ml whipping cream

* Adjust the amount of sugar based on your liking.

1. Cream mascarpone, sugar and vanilla extract in a chilled mixing bowl over a bowl of ice water until combine.

2. Add in whipping cream and beat until stiff.


To assemble the cake:

Cut strawberries

1. Slice the cake into 2 layers.

2. Lay first cake layer on a plate. Spread a thin layer of mascarpone cream on top of it evenly.

3. Sprinkle the cut strawberries evenly on the mascarpone cream layer.

4. Spread another thin layer of mascarpone cream on top of the strawberries.

5. Cover it with the other cake layer.

4. Frost the whole cake with the remaining mascarpone cream.

5. Sprinkles left over strawberries on top of the cake.

6. Store in the fridge for 1-2 hours.

7. Cut and serve while it's cold.

Chocolate cake
Soft and moist chocolate cake recipe
Chocolate cake with strawberry filling
Chocolate cake with mascarpone cream frosting
Chocolate cake

Thursday, July 23, 2015

Baked Chinese egg cake (ji dan gao) 烤鸡蛋糕 recipe

Chinese egg cake, also known as Ji Dan Gao in Mandarin is a kind of sponge cake with only 4 ingredients (probably this is the only recipe that I could remember). As the flavour comes from the eggs, using good quality free range eggs is quite important.

Chinese egg cake recipe

The following recipe which I got from Bake for Happy kids with minor modification is for baking instead of steaming. I'm not sure if it will yield the same result if it was steamed. Maybe someone can try and let me know :P

Recipe: 

(original recipe asked for a 5-6 inch round cake tin, but I used a 8 inch round cake tin which resulted in a shorter cake)

3 egg yolks
1 egg
50g corn oil
65g self raising cake flour (mix 65g cake flour with 1/2 tsp baking powder if you don't have self raising flour)

3 egg whites
50g icing sugar

1. Beat egg yolks and egg in a mixing bowl with a hand whisk.

2. Add in corn oil and stir to combine.

3. Sift in self raising cake flour and mix well. Leave the egg yolk mixture aside.

4. Beat the egg whites in another mixing bowl.

5. Gradually add in the sugar when the egg whites start to thicken. Beat until firm peak stage.

6. Loosen the egg yolk mixture by slowly stirring the mixture from the bottom of the mixing bowl using a whisk.

7. Add the egg white mixture onto the egg yolk mixture in 3 batches. Mix until they are almost combined on each addition. Lastly, scrape down and fold until everything is evenly combined.

8. Line cake pan with parchment paper. Pour batter onto the cake pan and spread the batter evenly. Lightly bang the cake pan on the table top a few times to release the air bubbles.

9. Bake in a pre-heated oven at 160c for about 30mins or until the inserted skewer comes out clean.

10. Remove the cake from the tin and let it cool on a wire rack.

Baked Chinese sponge cake recipe
Baked ji dan gao recipe
Ji dan gao recipe

Wednesday, June 24, 2015

Airfry roasted pork belly (siu yuk) 烧肉 recipe

Roasted pork belly in Chinese style (aka siu yuk) is one of the food I’d love to make with my new Philips Airfryer. In fact, it was probably one of the reasons I bought an airfryer. Roasted pork belly is my all time favourite. Who doesn’t like the crackling skin? However, making them in an oven is quite messy which requires a lot of cleaning later on. I was hoping there would be less cleaning with an airfryer and taste as good if not better. 

roasted pork belly recipe

The airfryer worked really well. The crackling pork belly was not only crispy on the skin but surprisingly juicy on the meat. So that’s a tick. However, I got to admit that it left a lot of oil and food residue in my airfryer after cooking. Besides that, due to the high fat content in the pork belly, the airfryer released a lot of smoke too when airfrying. Luckily, my airfryer was placed near the cooking hood. The ventilation fan was turned on all the time during the cooking. Otherwise, my house would smell like a BBQ pit. Overall, I think it’s still easier to clean an airfryer than an oven. Hence, I’d use it to make my yummy siu yuk again! 

Recipe:


1kg Pork belly
Vinegar (to brush on the skin) 
Coarse sea salt (enough to fully cover the skin)
Aluminium foil

Marinade: 
1 tablespoon shao xing cooking wine
1/4 teaspoon White pepper
1/2 tablespoon five spice powder
1 teaspoon salt

Note: The amount of marinade is estimated only. Adjust accordingly. 

1. Wash the pork belly with water and pat dry it with towel papers. 

2. Rub the shao xing cooking wine evenly on the meat of the pork belly only (strictly NOT on the skin). 

3. Repeat step #2 with white pepper, five spice powder and lastly salt. 

4. Place the pork belly skin side up on a plate and store it in the fridge overnight without any cover. This is a process to dry up the skin to achieve the cracking skin later on. 

5. Remove the pork belly from the fridge. Prick all over the surface of the pork belly skin with a sharp object (skewer/knife). Try to make as many small holes as possible but avoid pricking too deep into the meat. 

6. Lay the pork belly skin side up on a large sheet of aluminium foil (sufficient to wrap the pork belly). Wrap the pork belly tightly with the aluminium foil around the sides with only the skin exposed. The sides of the aluminium foil should be slightly higher than the pork belly so that it can hold the coarse sea salt in the next step. 

7. Lightly brush the skin with vinegar. Cover the pork belly fully with coarse sea salt until you can't see the skin. 

8. Place it in the basket of the airfryer. Airfry for about 25-30mins in a pre-heated airfryer at 180c.

9. Remove the pork belly from the airfryer. Gently remove the aluminium foil and scrap off the layer of coarse sea salt. 

10. Increase the airfryer temperature to 200c. Return the pork belly into the airfryer. Airfry at 200c for another 10-15mins or until the skin is crackling. 

11. Cut the pork belly and serve. 

Note: Adjust the cooking time accordingly as the size and thickness of the pork belly is different. 

Refer to the following video for the steps:

airfry siu yuk recipe
airfry roasted pork belly recipe
Chinese roasted pork belly recipe

Thursday, June 18, 2015

Rice dumpling (Zong zi / Bak zhang) 粽子 recipe

I did it! Haha. Yes, I successfully made rice dumplings or zong zi for the first time. Yay! 

rice dumpling recipe
bak zhang recipe

Well, I really really love eating rice dumplings especially those made by my mum. Whenever I visit Malaysia, my mum would prepare these yummy rice dumplings for me regardless the time of the year. So I eat it for breakfast and tea break everyday until the stock is finished. As the dragon boat festival (that's when Chinese people eat rice dumplings or zong zi) is around the corner, I decided to make my own rice dumplings by following my mum's recipe simply because I can't find any nice rice dumplings around Melbourne! Yup, they actually sell them here (that's how multicultural Melbourne is) around this time but they aren't nice at all. Not to mention, they're expensive considering that there aren't much ingredients in the dumplings sold here!

There's no problem in getting all the ingredients I need to make the rice dumplings in Melbourne. In fact, you can get everything in an Asian grocer like Hometown Asian supermarket. However, the locally made fresh salted egg is really expensive and the quality is not as good as those you get in Malaysia. Somehow, the salted egg yolks from the fresh salted eggs aren't as solid and are a bit runny. Besides that, I'm not into cooked-salted-eggs from China. Luckily, there's this locally made frozen salted egg yolks (yup, egg yolks only. They removed the egg white and packed all the egg yolks in a box) available in the frozen department of Hometown Asian supermarket. It's not cheap (10 frozen egg yolks for AUD15), but at least it guarantees that I get these solid salted egg yolks for making my dumplings. So if you have time, do make your own salted eggs at home!

We're lucky to have fresh chestnut from the local produce. So I used fresh chestnuts instead of dried chestnuts. It's also worthwhile to mention that the bamboo leaves usually come with strings. However, the string snapped every time I tied the dumplings. Thank goodness I've a roll of cooking rope in my pantry for tying the dumplings. Hence, make sure you have some ropes around for backup if you decide to use the bamboo strings. Other than that, I must admit that it's a bit hard to wrap the dumplings at the beginning especially if the dumpling is big. However, after a few wraps, you'll get the hang of it when you gain more confidence. 

Overall, making rice dumplings is very time consuming. From my perspective, the time spent for preparation and wrapping the dumplings isn't too extensive. However, boiling the dumplings on the stove for 2-3 hours is really a long process. I came across some discussions in a forum where people shared their experience in using a pressure cooker for cooking rice dumplings. Apparently, the cooking time was reduced to only 15mins!! Well, I haven't tried that as I don't have a pressure cooker at the moment. I reckon it's worth trying if you have one. 

Rice dumplingrecipe

Recipe: 

(make about 26 rice dumplings)

500g pork belly (without skin)
8 dried mushrooms (I used big dried mushrooms)
1kg glutinous rice
120g dried shrimps 
1 garlic (about 10 cloves)
20 shallots (can be more to give more flavor)
26 chestnuts
13 salted egg yolks 
60 bamboo leaves (2 leaves for each dumpling and extra for backup)
Bamboo strings/cooking rope (enough to tie all the dumplings)
3 tablespoons oil

Seasoning for glutinous rice:
1 tablespoon salt

Marinade for pork belly:
1 teaspoon salt
1 teaspoon white pepper
1 1/2 tablespoons five spice powder
1 tablespoon dark (caramel) soya sauce
3 tablespoons oyster sauce
1 teaspoon Shao xing cooking wine
1 tablespoon light soya sauce
1 teaspoon sesame oil

Preparing the ingredients:


1. Cut pork belly into 2-3cm pieces, marinade and keep it overnight in the fridge. 

2. Soak bamboo leaves and strings in water overnight. Make sure that the water covers all the leaves. Clean each leave on the next day using a clean sponge and water. Drain the water and set the leaves aside. 

3. Soak dried mushrooms overnight and cut into thick slices. 

4. Soak glutinous rice for about 3 hours. Rinse and mix in salt. 

5. Cook fresh chestnuts in boiling water for 8mins and remove the shells. 

6. Soak dried shrimps for 15mins, rinse and pat dry with towel paper. 

7. Chop garlic and shallots. 

8. Cut salted egg yolks into half.

9. Heat oil in a frying pan, fry garlic and shallots until fragrant. 

10. Add in pork belly and the marinade. Briefly stir fry until the pork is half cooked. 

11. Remove the pork from the frying pan. 

12. Pour the remaining stir-fried garlic and shallots as well as the sauce onto the glutinous rice. Mix well. 

13. In the same frying pan, fry the dried shrimps until they're lightly brown and fragrant. Remove from the frying pan and set aside. 

14. Repeat step #13 with the mushrooms. 

Wrapping the rice dumplings: 


1. Stack 2 bamboo leaves with the smooth side facing up and form a cone shape. 

2. Add 1 tablespoon of glutinous rice, followed by 1 piece of pork belly, a slice of mushroom, a chestnut, 1 teaspoon of dried shrimps and 1 halved egg yolk. Cover it with another tablespoon of glutinous rice or more so that the cone is almost filled. 

3. Now, fold down the leaf to cover the brim of the cone and hold it into a triangular shape. You'd need to hold it tight. 

4. Fold the remaining leaves around the pouch by following the triangular shape. 

5. Tie the dumpling tightly with a string. It's important that the dumplings are nicely packed and tied to avoid any leakage when cooking them later.

6. Repeat step #1 to #5 until all the ingredients are used up. 

Cooking the rice dumplings:


1. Fill a large pot with 1/2 - 2/3 of water and add in some salt. Bring the water to boil. 

2. Gently place the rice dumplings into the boiling water. Make sure all the dumplings are submerged in the water. (Use more than a pot or cook the dumplings in batches if your pot is not big enough to cook all the dumplings.)

3. Boil the rice dumplings with the lid covered for about 2-3 hours. As water evaporates while boiling, add some boiling water into the pot whenever the water level goes down.

4. Remove a rice dumpling from the pot after 2.5 hours to check if it's been cooked to the right texture. 

5. Remove all the rice dumplings from the pot once they're cooked and place them in a colander/big strainer if not hanging them somewhere to drain the water. 

6. Serve when it's slightly cooled. I find that rice dumplings taste better after it's cooled. Somehow, it tastes even better on the next day onwards. 

zong zi recipe

Thursday, June 4, 2015

Airfry grilled chicken thighs recipe

Airfryer is my great kitchen buddy nowadays. And it works really well on meat! I've been making some quick and easy grilled chicken for dinner when I'm busy. What you really need is to prepare the meat and leave the rest of the job with the Airfryer. How easy?!

Grilled chicken thighs recipe

Well, so I thought I'd share this easy and yummy grilled chicken thighs recipe. The chicken thighs were cooked in just 12 mins at 180c in my Philips Airfryer. My oven would probably take about 18-20mins to get the same browning effect. 

Other than the shorter cooking time, the meat was cooked to perfection too. The chicken thighs were nicely brown and the meat was tender as well as juicy!

Recipe: 


2 skinless chicken thighs 
1-2 sprigs of fresh rosemary
3 sprigs of fresh parsley
A generous sprinkle of garlic powder (all over the chicken thighs)
sprinkle of chilli flakes (adjust according to your liking)
1/2 lemon 
salt and pepper to taste

1. Rinse the chicken thighs with water and pat dry them with towel paper. 

2. Remove the rosemary leaves from the sprigs and discard the sprigs. 

3. Chop or mince the fresh parsley. 

4. Marinate the chicken thighs with parsley, rosemary leaves, garlic powder, chilli flakes, lemon juice, salt and pepper for at least an hour or longer for better flavour. I marinated the chicken overnight in the fridge. 

5. Grill for about 12 mins or until brown in a pre-heated airfryer at 180c. Adjust the timing accordingly as the size or thickness of the chicken thighs used are different.

6. Serve while it's warm.    

Airfry grilled chicken thighs recipe

Tuesday, June 2, 2015

Airfried sweet potato recipe

I finally bought a Philips Airfryer XL! Looks like I'll need a bigger kitchen if I'm to get any more new appliances from now on as this new gadget is taking up a lot of space.

What's the first food you cooked with your airfryer? Mine was sweet potato fries! Strange choice? Well, I fell in love with sweet potato fries ever since I ordered it from Roll'd - a Vietnamese food chain in my office building. I would usually order a side sweet potato fries to accompany my lunch meal. Therefore, I want to create a healthier version of sweet potato fries that I could eat it everyday! :)

Airfry sweet potato

The verdict? I must say that the airfryer is a fantastic invention. The freshly cut sweet potato was turned into crunchy fries in just 12 mins with little to no oil! Of course, the healthier airfried version differs from the normal deep fried version but it's close. It's crispy on the skin but without the oil taste that you get from deep-frying in oil. I think it is a very good alternative to enjoy a healthier version of "fried" food. 

Besides that, I love the cleaning part too. You just need to wash the basket and the pan. Both parts are dish washer safe. So far, the interior of the appliance had no food residues after my cooking. Hence, I merely wiped it using a damped cloth.


Recipe:


1 big sweet potato 
1/2 tablespoon oil (I used rice bran oil)

1. Cut sweet potato into strips. 

2. Put the sweet potato strips in a ziplock bag. Add in oil, ziplock it and shake so that each strip is coated with oil.

3. Place the sweet potato fries onto the basket of the airfryer. Airfry for about 12 mins in a pre-heated airfryer at 180c.

Airfry sweet potato

Airfry sweet potato

Sweet potato fries

Friday, May 29, 2015

Banana muffin recipe

I've never baked a banana flavoured cake before this. In fact, I haven't made muffins ever since I fell in love with the light and fluffy sponge cakes. However, things changed when I found out that my little one actually loves banana muffin from her carer! So, I decided to bake some banana muffins for her afternoon tea. I had baked a few batches of banana muffins now by constantly adjusting the ingredients to achieve a lighter version of banana muffins. 

Banana muffin recipe
Banana cupcake
Banana muffin

Below is the recipe that I'm happy with. Please note that I've reduced the sugar significantly as it is meant for kids. Hence, please adjust the sugar amount to your liking. 


Recipe:

(make 10 muffins)

150g cake flour (cake flour makes the cake lighter)
1 1/4 teaspoons baking powder
1/2 teaspoon baking soda
Pinch of salt
2 large eggs
50g castor sugar
1/2 teaspoon vanilla extract
60g canola oil 
80g buttermilk 
200g banana puree
30g rolled oats (Optional. A small amount of oats were added merely for making the muffins more nutritional)

1. Sift cake flour, baking powder and baking soda onto a mixing bowl. Mix in a pinch of salt and leave the flour mix aside. 

2. Beat eggs in another mixing bowl using medium speed for about 30 seconds. 

3. Add in sugar and beat for another 30 seconds on medium speed. 

4. Add in vanilla extract and canola oil and beat further for another 1 minute on the same speed. 

5. Add in half buttermilk and half flour mix. Mix evenly using a whisk. 

6. Mix in the remaining butter milk and flour mix until combine.  

7. Gently mix in banana puree and oats until everything is evenly combined. 

8. Pour the batter into the cupcake cases, about 1/2 full each. I find it easy to use an ice-cream scoop to evenly allocate the batter onto each cupcake case. 

9. Bake in the preheated oven at 175c for about 12-15mins on the lower rack.

10. Remove the cupcakes from the oven and let them cool on the wired rack.

Thursday, May 21, 2015

Chocolate sponge cupcakes recipe

Whenever I've friends over to visit, cupcakes would be the first thing that comes to mind for a light refreshment. And so it's time for cupcakes again! I chose to bake some chocolate flavour cupcakes this time thinking that who doesn't like chocolate? The cupcakes turned out really well. Seriously, I would never get bored of these spongy cupcakes. They're so light and fluffy regardless with or without frosting.

chocolate sponge cupcakes
spongy chocolate cupcake
chocolate sponge cupcake

If you're looking for a simple chocolate sponge cupcakes recipe, you've come to the right place. However, please note that I've significantly reduced the amount of sugar as I was catering for some junior guests. :)

Recipe:

(make 16 small cupcakes)

Chocolate sponge cupcakes:


50g vegetable oil
20g Dutch cocoa powder
60g egg yolks
25g castor sugar
80g milk
Pinch of salt
85g cake flour

180g egg whites
1/4 teaspoon cream of tartar
55g castor sugar

1. Heat the vegetable oil until hot but not until smoking point.

2. Pour hot oil onto the cocoa powder in a mixing bowl and leave it aside to cool.

3. Whisk egg yolks and sugar in a mixing bowl until pale and thick.

4. Add milk, salt and stir to combine.

5. Add cocoa mix and stir thoroughly.

6. Sift half the cake flour into the mixture and mix evenly.

7. Sift the remaining cake flour into the mixture and mix evenly. Leave the mixture aside.

8. Beat the egg white in a mixing bowl.

9. Add cream of tartar as soon as the beaten egg white starts to foam.

10. Gradually add in the sugar when the egg white starts to thicken. Beat until stiff peak stage.

11. Add the egg white mixture onto the egg yolks mixture in 3 batches. Mix until they are almost combined on each addition. Lastly, scrape down and fold until everything is evenly combined. Bang the batter on the table for a few times to release the big air bubbles.

12. Pour the batter into the cupcake cases, about 3/4 full each.

13. Bake in the preheated oven at 165c for about 25mins on the lower rack.

14. Remove the cupcakes from the oven and let them cool on the wired rack.

Chocolate cupcake with mascarpone cream

Mascarpone cream for frosting:


250g mascarpone
2 tablespoons castor sugar*
A few drops of vanilla extract
150ml whipping cream

* Adjust the amount of sugar based on your liking.

1. Cream mascarpone, sugar and vanilla extract in a chilled mixing bowl over a bowl of ice water until combine.

2. Add in whipping cream and beat until stiff.

To assemble the cupcakes:


Chocolate sprinkles

1. Pipe the mascarpone cream on the cupcakes.

2. Sprinkle some chocolate sprinkles on the cream and serve.

Thursday, May 7, 2015

Green tea Swiss roll recipe

I got to admit that I'm a really stubborn person. In my previous post about the chocolate Swiss roll, I was convinced that a single sponge cake recipe can't be used for making other types/shapes of sponge cake such as a Swiss roll. However, I later baked a green tea Swiss roll using my green tea Hokkaido cupcakes recipe as an experiment. And of course, it proved that the theory is correct! Well, the Swiss roll wasn't unedible. However, it's definitely not the right texture for a Swiss roll. Unlike the light and moist green tea Hokkaido cupcakes, the Swiss roll was dense and dry. The only plus point was that it was very easy to roll as it never cracks! LOL.

Green tea swiss roll

Therefore, I decided to bake a good green tea Swiss roll after that. This time, I followed the recipe from Kitchen Tigress as the previous chocolate Swiss roll turned out really well. As expected, the result was excellent. The green tea Swiss roll was really moist and soft. Two thumbs up! :)

Recipe: 

The sponge cake

(Original recipe asked for 13”x10”, I used a 37x25cm cake pan which resulted in a thinner cake)


60 g egg yolks
20 g castor sugar
30 g corn oil
1 tablespoon green tea powder mixed with 4 teaspoons of hot water (about 20g) just enough to dissolve the green tea powder into thick green tea mixture. Let it cool before using.
30 g cake flour

140 g egg whites
1/8 tsp cream of tartar
40 g castor sugar


1. Whisk egg yolks and sugar in a mixing bowl until pale and thick.

2. Add corn oil and whisk to combine.

3. Add green tea mixture and stir thoroughly.

4. Sift in cake flour and mix well. Leave the batter aside.

5. Beat the egg white in a mixing bowl.

6. Add cream of tartar as soon as the beaten egg white starts to foam.

7. Gradually add in the sugar when the egg white starts to thicken. Beat until firm peak stage.

8. Loosen the egg yolk mixture by slowly stirring the mixture from the bottom of the mixing bowl using a whisk.

9. Add the egg white mixture onto the egg yolks mixture in 3 batches. Mix until they are almost combined on each addition. Lastly, scrape down and fold until everything is evenly combined.

10. Grease the cake pan and line cake pan with parchment paper. The length of the parchment paper should be the same length of the cake pan but the width should be slightly longer so that the batter would directly contact with only 2 sides of the cake pan. Example: use a 12”x12” parchment paper on a 12”x10” cake pan.

11. Pour batter onto the cake pan and spread the batter evenly. Lightly bang the cake pan on the table top twice to release the air bubbles.

12. Bake on the middle shelf in a pre-heated oven at 200c for about 10 minutes.

13. Remove the cake from the oven; lightly bang the cake pan on the table top a few times.

14. Unmould the cake and let it cool on a wire rack with the parchment paper peeled from the sides of the cake but still intact with the bottom of the cake.

Green tea whipped cream:


150ml whipping cream
1 tablespoon sugar
1 teaspoon green tea powder
A few drops of vanilla extract

Note: adjust the amount of sugar and green tea powder according to taste.

1. Pour whipping cream onto a chilled mixing bowl over a bowl of ice water. Add in sugar and vanilla extract. Beat until the cream is at soft peak stage.

2. Add in green tea powder and beat until stiff. You can always adjust the sugar and green tea powder from time to time.

To assemble the cake:


1. Gently remove the parchment paper that was attached to the cake after baking. Place the cake on a clean sheet of parchment paper.

2. Spread the green tea whipped cream evenly on the cake.

3. Gently roll the cake with the parchment paper.

4. Chill the cake in the fridge with the parchment paper until the filling is set.

5. Cut and serve.

Moist and soft green tea swiss roll